How to Tile a Bathroom Wall
16 June 2026 Joe HartleyIntermediate1–2 days per wall (plus drying)10 comments
Tools
- Spirit level, straight edge, and chalk line
- Notched trowel
- Tile spacers or levelling clips
- Manual cutter and tile nippers
- Wet saw (helpful for porcelain)
- Tile adhesive and grout
- Grout float, sponge, and buckets
- Sanitary silicone
Bathroom walls take steam, splash, and heavier traffic than a kitchen splashband. You need a sound background, a layout that avoids skinny cuts at basins and windows, and adhesive coverage that does not leave hollow patches behind large tiles.
For a shower tray or cubicle that sees direct spray all day, stop after reading the waterproofing note below and follow how to tile a shower enclosure. This guide is for general bathroom elevations: basin wall, WC wall, and half-height splash zones outside the enclosure.
What background are you on?
| Background | Ready to tile? |
|---|---|
| Sound painted plaster | Degrease, key gloss, fill hollows |
| Moisture-resistant plasterboard | Screw-fixed, joints taped if specified; no soft paper face |
| Ordinary plasterboard in a steamy room | Prefer MR board in wet zones; paint is not waterproofing |
| Old tiles, firm and flat | Maybe: see tiling over existing tiles when OK |
| Loose tiles or soft plaster | Strip carefully with how to remove old tiles without wrecking the wall, then repair |
Tap the wall. Hollow plaster and drumming old tiles fail under new weight. Fix movement and damp first. Adhesive does not bridge a rotten board.
Bathtub lip: Where tiles meet a bath rim, leave a silicone joint, not grout. The bath flexes when filled. Plan the lowest course so a full or near-full tile sits above the rim after silicone thickness.
Tools and materials
| Item | Notes |
|---|---|
| Wall tiles | Check packing: bathroom packs often mix shades |
| Flexible powder adhesive | Better on board and heated rooms than cheap ready-mix alone |
| Spacers | 2–3 mm typical; match any existing adjacent tiling |
| Cutter / wet saw | Porcelain needs a decent cutter or wet saw |
| Grout | Anti-mould cementitious for bathrooms |
| Sanitary silicone | Internal corners, bath and basin junctions |
| Tile trim | External corners and open ends if edges are unglazed |
Balance the layout before adhesive
- Measure width and height. Mark the centre of the main wall, or centre on a feature (basin, window).
- Dry-lay or calculate tile modules plus joints. Shift the starting line so end cuts are equal and wider than about a third of a tile where you can.
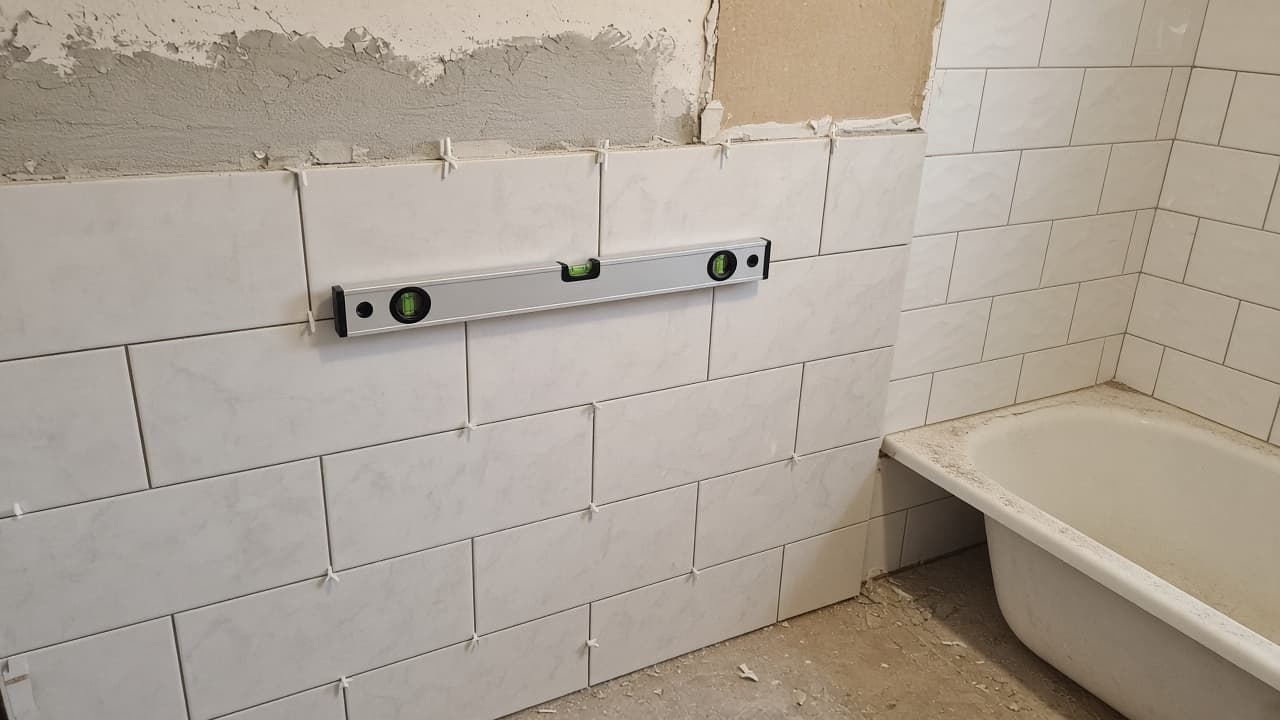
- Snap a level datum line for the first full course above the bath or skirting zone. Floors and baths are often out; the datum is your truth.
- Fix a temporary support batten on that line if you are tiling upwards from mid-wall. Remove it after set and complete the lower course.
Around a basin pedestal or vanity, expect awkward cuts. Cut dry first when you can. Mark the waste clearly so you do not snap the wrong side.
Step-by-step
1. Prep the face
Clean, dry, and flat. Prime dusty plaster if the adhesive maker requires it. Mask taps and sanitaryware. Isolate electrics before removing fan or light faceplates that sit in the tiled zone.
2. Comb adhesive in manageable bays
Mix adhesive to hold a notch without slumping. Comb onto the wall (and butter the back of large or textured tiles if the bag says so). Work an area you can tile in about 15–20 minutes.
3. Bed the tiles
Press and twist into the ridges. Insert spacers. Check flatness across four tiles with a straight edge. Tap proud corners down early; once adhesive skins, lippage fights you.
4. Cut and fit edges
Score and snap straights. Use a wet saw for porcelain and for returns into window reveals. Keep a consistent joint into internal corners; do not crush two tiles hard together and call it a joint.
5. External corners and trim
Slide trim into the adhesive bed as you set the edge tiles, or mitre if you are confident. Trim must sit true; a twisted profile shows under bathroom lights.
6. Clean, cure, grout
Pick adhesive out of joints while soft. After full set, grout firmly, wipe, and buff haze. Tool sanitary silicone at bath, basin, and change-of-plane corners after grout has cured enough to stay clean.
Where DIY bathroom walls go wrong
- Treating a steamy shower wall like a dry WC wall and skipping tanking inside the enclosure.
- Starting from the floor with no datum so joints climb away from the bath line.
- Starved adhesive beds on large tiles (looks fine until a corner rings hollow).
- Grouting the bath seal. It cracks within months.
- Mixing tile batches randomly so one wall is a shade darker under cool LED light.
When to call a pro
Call a tiler for full wet rooms, large-format walls with strict flatness, or when the substrate needs rebuilding. Call a plumber if sanitaryware must move. Call a Part P electrician for new circuits or relocating fans and lights. Structural movement cracks that reopen after filling need diagnosis before you bury them under tile.
Related: tile a kitchen splashback if you want a simpler practice run, tile a shower enclosure for spray zones, tile over existing tiles when OK, remove old tiles without wrecking the wall.
FAQ
Do bathroom walls need waterproof tanking everywhere?
Not always. Direct spray zones (shower enclosures, wet rooms) need a proper waterproofing system under the tiles. General bathroom walls outside the spray zone usually need a sound, moisture-tolerant background and good ventilation, not full tanking. Follow the enclosure guide for wet areas.
What adhesive should I use on plasterboard?
A flexible cementitious wall adhesive rated for the board and tile type. Check the bag for plasterboard and for heated bathrooms. Ready-mixed can work for small ceramic tiles; powder is often safer for porcelain and larger formats.
How long should I wait before grouting?
Follow the adhesive data sheet. Overnight is common for wall tiles in UK room temperatures. Cold bathrooms take longer. Grouting too early smears adhesive into joints and weakens the bed.
Can I tile only half-height and paint above?
Yes. Finish the top edge with trim or a neat cut and silicone, and use a bathroom-grade paint above. Keep the tiled band level all round the room so the paint line does not step.
10 comments