How to Join Laminate Worktops
19 August 2026 Joe HartleyIntermediate2–4 hours18 comments
Tools
- Worktop jig and router (for mason’s mitre) or fine saw
- Worktop connecting bolts
- Spanners
- Worktop sealant
- Clamps
- Straight edge
- Masking tape
Laminate worktop joints fail in two ways: the front edge steps, or water creeps into the chipboard core. A good joint is dry-fitted until the noses match, sealed wet, then pulled up with proper worktop bolts. Do this on level base units with the boards already cut to the run (how to fit a kitchen worktop). A stepped carcass will always show as a ridge in the laminate.
Straight butt, mason’s mitre, or leave it
| Joint style | When to use | What you need |
|---|---|---|
| Mason’s mitre (jig + router) | Standard L-shape or peninsula on post-formed laminate | Hired or bought worktop jig, compatible router cutter, connecting bolts |
| Straight butt with bolt connectors | Some straight joins on a cupboard | Factory or carefully squared ends, bolts, sealant |
| Secret butt / biscuit only | Light duty or temporary | Not enough alone for a wet kitchen joint |
| Fabricator joint | Expensive boards, curved profiles, stone | Template and factory finish |
For an L-shape, a mason’s mitre hides the joint along the corner and keeps the post-formed front edge continuous. Follow the jig’s left-hand / right-hand instructions; mixing them up wastes an expensive board.
Place the joint over a carcass side or add a support panel underneath. Do not land the seam in the middle of a dishwasher opening.
Joint kit and sealant
| Item | Notes |
|---|---|
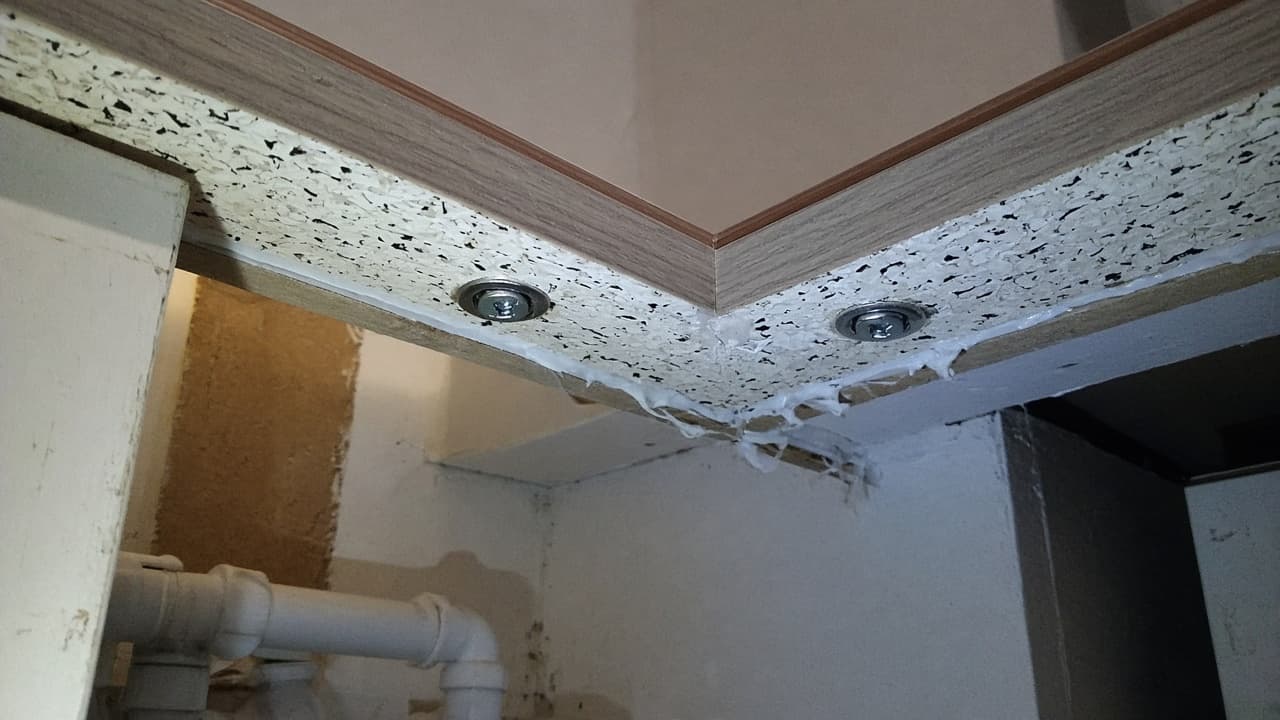
| Worktop connecting bolts | Usually three per joint; recesses routed or drilled on the underside |
| Worktop sealant | Colour-matched if you can; waterproof when cured |
| Masking tape | Protects the laminate face from smears |
| Solvent wipe / cloths | Clean squeeze-out before it skins |
Cut sink and hob apertures after the joint is cured and the top is fixed, where possible. Crossing a fresh joint with a jigsaw invites tear-out. Sink openings: how to cut a worktop for a sink.
Step-by-step
1. Dry-fit the boards
Lay both lengths on the units (or on trestles at the same height). Align the front post-formed edges with a straight edge. If the noses disagree by a millimetre, fix that with the jig setup or a careful trim before you think about sealant. Check underside clearance for bolt heads above drawers.
2. Form the joint profiles
Clamp the jig firmly. Router in shallow passes rather than forcing one deep cut; laminate chips if the cutter chatters. Cut bolt recesses and any biscuit slots the kit uses. Vacuum dust out of the chipboard pores so sealant can wet the core.
3. Trial the bolts
Assemble the joint dry with bolts finger-tight. Confirm the top faces are flush and the front edge is continuous. Ease any high spot now. Loosen and separate the boards for sealing.
4. Seal and pull up
Run a continuous bead of worktop sealant on both cut faces (enough to squeeze out, not a smear). Bring the joint together, insert bolts, and tighten evenly, working from the front bolt toward the back so the visible edge closes first. Wipe excess sealant immediately with a suitable cleaner; dried sealant on a textured laminate is miserable to remove.
5. Support, fix, and leave it
With the joint tight, fix the top down to the carcasses as in the main worktop fitting guide. Avoid leaning on the joint for the sealant’s full cure time (check the tube). Then continue with upstands, wall units if still outstanding, and sink cut-outs once the joint has cured: how to cut a worktop for a sink.
Common mistakes
- Starving the joint of sealant. A dry chipboard edge swells at the first kettle overflow.
- Tightening the back bolt first. The front edge lips and never quite returns.
- Joining on units that are not coplanar. The bolts bend the boards into a hollow that opens again.
- Using wood screws through the face instead of proper underside connectors. You cannot hide that mistake.
When to get a fitter
Hire a kitchen fitter or worktop specialist if the board is premium, the corner is not a standard 90 degrees, or you need a polished joint on a visible breakfast bar. Gas hobs near a joint still need Gas Safe connection; do not let a DIY joint project turn into moving gas pipe.
Related cluster links: fit a kitchen worktop, level kitchen base units, fit kitchen base units, cut a worktop for a sink.
FAQ
Do I need a worktop jig to join laminate?
For a clean mason’s mitre on post-formed laminate, yes (or a fitter who owns one). A straight butt joint can work on a hidden straight seam if the ends are square and bolted, but L-shaped kitchens usually want the jig.
How many connecting bolts per joint?
Typically three. Use the recesses the jig or manufacturer provides. Two bolts often leave the back of the joint hungry.
Why does my worktop joint still show a ridge?
Usually the base units were not level across the joint, or the front edges were not aligned before tightening. Loosen, pack or re-level the carcasses, and reassemble with fresh sealant if the old bead has skinned.
18 comments