How to Replace an Isolation Valve
11 August 2026 Joe HartleyIntermediate45–90 minutes14 comments
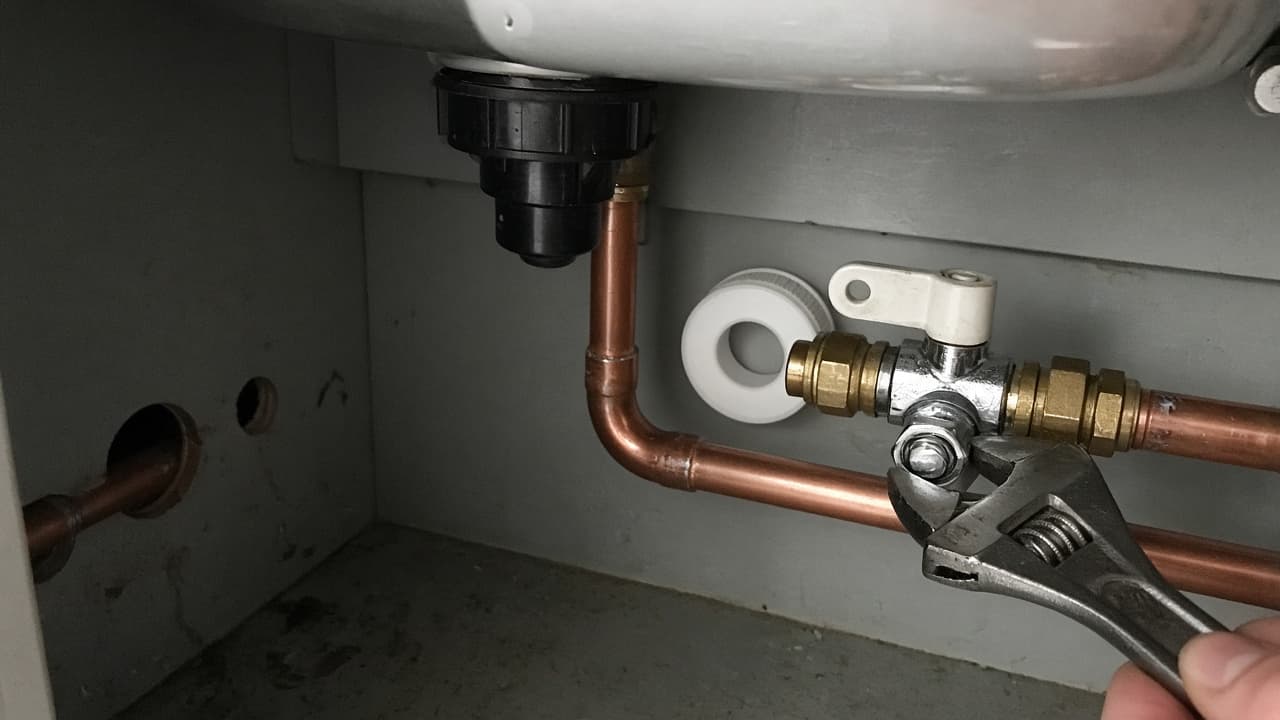
Tools
- Adjustable spanners (two)
- Pipe slice or junior hacksaw (if cutting back)
- Deburring tool or emery cloth
- Replacement isolation valve (compression or push-fit to match)
- PTFE tape or jointing compound if the valve type needs it
- Bucket, towels, and torch
- Marker for pipe alignment
A sticky or leaking isolation valve under a sink forces you onto the main stopcock for every drip. Replacing that small service valve restores local shut-off for one tap or appliance. You will need the mains off while the pipe is open, then a clean, square joint so the new valve seals first time.
Know how to isolate at the stopcock before you cut or crack a compression nut. If the flexi above the valve is seized, free that separately: remove a seized tap connector.
Compression, push-fit, or soldered?
| Existing joint | Typical DIY path |
|---|---|
| Compression nuts and olives on copper | Undo nuts, swap valve, reuse sound olives or fit new ones |
| Push-fit (plastic or copper inserts) | Release collets as the maker shows; do not saw through the fitting body casually |
| Soldered valve hard against the pipe | Cut out and replace with compression or push-fit inserts; torch work needs skill and clearance |
Match the pipe size (15 mm is common on basin and kitchen spurs). Buy a valve with a screwdriver slot or lever you can actually reach once the waste trap is back in. Cheap valves with a buried slot behind the dishwasher hose are a false economy.
Job-specific detail: Under-sink valves often sit millimetres from chipboard carcasses. Mark the open/closed orientation on the cupboard side wall before removal. A new lever that opens into the hinge line will jam shut the first time you rest a bottle of bleach against it.
Parts and prep
| Item | Notes |
|---|---|
| Isolation valve | Same size; full bore if you want decent flow to a mixer |
| Olives | New olives are safer if the old ones are scored or distorted |
| PTFE | On tapered male threads only if the fitting design asks for it; not packed into an olive seat |
| Torch | Cupboard light lies; you need to see the olive bite |
Clear the cupboard. Put a tray under the joint. Photograph the pipe run so hot and cold do not get swapped on a mixer spur.
Step-by-step
1. Isolate the mains and prove dry
Close the main stopcock. Open the tap on this circuit until flow stops. If water keeps coming, do not open the joint. Fix isolation first.
2. Disconnect the flexible or appliance hose
Undo the connector above the valve into the bucket. Cap or bag the hose end so grit does not fall into the tap.
3. Undo or cut out the old valve
For compression: hold the valve body with one spanner and turn the nuts with the other. Ease the valve off the olives. For a seized soldered body, cut the copper square either side, leaving enough straight pipe for the new fitting’s insertion depth.
4. Prepare the pipe ends
Deburr inside and out. Clean old jointing compound off the copper. Check the pipe is round; ovalised copper from old over-tightening will not seal on a new olive.
5. Fit the new valve the right way round
Many valves have a flow arrow. Point it toward the tap. Slide nuts and olives on in the right order before the valve body goes between the pipes. Hand-engage both nuts, align the handle where you can reach it, then tighten evenly. Do not crush plastic pipe with brass compression without the correct inserts.
6. Refit the flexi and restore water
Reconnect the tap connector with a fibre or rubber washer in good condition. Open the stopcock slowly. Cycle the tap. Feel around nuts with kitchen towel after a few minutes; a slow weep often needs a careful further quarter-turn, not a heroic heave.
Mistakes that create a second leak
- PTFE wound over the olive seat so the olive never bites the copper.
- Fitting the valve arrow toward the mains so the handle logic feels backwards and you leave it half open.
- Twisting the rising main while undoing a seized nut because nobody counter-held the body.
- Reusing a deeply scored olive that weeps as soon as pressure returns.
- Cutting plastic pipe with a coarse saw and leaving swarf that lodges in the new valve seat.
When to call a plumber
Stop if the pipework is lead, the copper is pinholed, you cannot get the mains to shut off, or the joint sits inside a sealed boxing you would have to destroy without a clear rebuild plan. Shared risers in flats and valves buried behind fitted kitchen carcasses with no access panel are fair reasons to hand over. A plumber can also convert a soldered spur to compression cleanly when space is tight.
Related reading: isolate a water supply at the stopcock, replace flexible tap connectors, replace a kitchen tap, and change a tap washer.
FAQ
Do I need to drain the whole house to replace one isolation valve?
You need the cold mains off at the stopcock (or upstream of that spur). You do not need to empty the hot cylinder for a cold spur alone, but open local taps so the short pipe empties before you crack the joint.
Can I replace a soldered isolation valve myself?
Yes if you cut it out and fit a compression or push-fit valve on clean pipe ends and you are confident with those joint types. Re-soldering in a cramped, flammable cupboard is where many DIY jobs should stop.
Why does the new valve still weep at the nut?
Usually a damaged olive, pipe not square, nut not tight enough, or debris on the seat. Isolate again, remake the joint with a new olive, and tighten while holding the body still.
14 comments