How to Tighten a Loose Tap
9 August 2026 Joe HartleyBeginner20–45 minutes18 comments
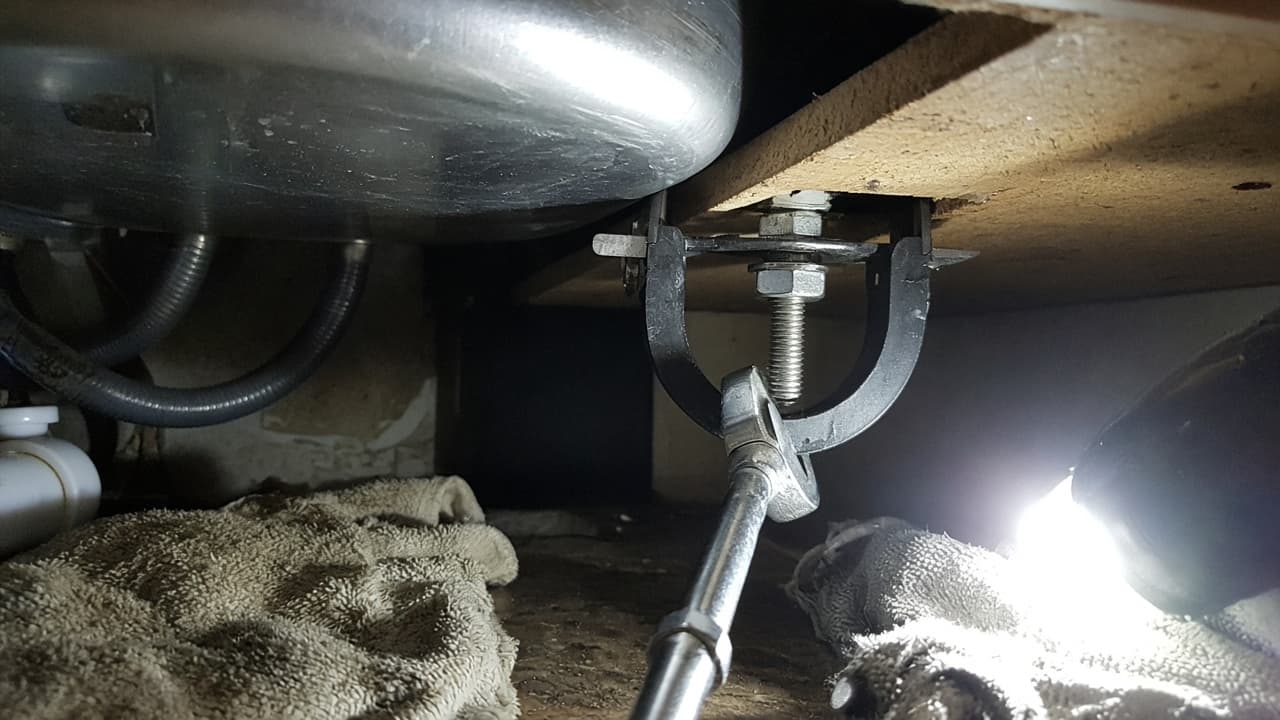
Tools
- Basin wrench or adjustable spanner
- Torch or head torch
- Replacement deck washers (optional)
- Towels
A loose tap twists when you turn the handle and can start weeps at the base. Tightening a loose tap is usually an under-sink job: the clamp nut or horseshoe plate has worked free, or the deck gasket has flattened. You rarely need to disconnect the water if the tails still reach comfortably.
If the spout drips when the tap is off, that is a washer or cartridge job, not a wobble. See how to change a tap washer or how to fix a dripping mixer tap.
What kind of loose?
| Symptom | Likely cause |
|---|---|
| Whole body rotates on the sink or basin | Clamp nut / backnut loose under the deck |
| Body sits tilted | Uneven tighten or missing horseshoe plate |
| Handle loose, body firm | Grub screw or handle retainer |
| Tap pulls toward one side when you use it | Short flexi pulling; or clamp only tight on one side |
China basins crack if you lean on a long spanner from below. Support the tap from above while you tighten.
Clear the cupboard and sight the fixing
Empty the space under the sink or vanity. Put a torch on the fixing: monobloc mixers usually have a single stud with a horseshoe plate and nut; pillar taps have a backnut on each. Under-sink light is usually awful, so a head torch helps more than a phone flash.
Check the flexible connectors are not kinked or so short they tug the tap sideways. A tug feels like a loose deck fixing until you relieve the tails.
Step-by-step
1. Steady the tap from above
Have a helper hold the tap square, or wedge a soft cloth so the spout points the way you want it. Mark the spout direction with a bit of tape on the sink if you are working alone.
2. Tighten the clamp from below
Turn the nut so the plate pulls the tap down evenly. Snug, not crusher-tight, especially on stainless sinks and acrylic basins. If the nut just spins, the stud may be turning with it: hold the tap firmly above or check for a locking flat on the stud.
3. Renew a flattened gasket if it still rocks
If the body still moves after a firm tighten, isolate the water, disconnect tails, and lift the tap enough to replace the base gasket or add the manufacturer’s spacer kit. Clean old sealant off the deck so the new gasket sits flat.
4. Secure a loose handle separately
If only the lever wobbles, tighten the side grub screw or the screw under the indicator cap. Do not keep cranking the deck nut for a handle problem.
5. Test movement and weeps
Work the tap through its full travel. Check the base with a dry tissue. Open and close a few times; some nuts settle and need a quarter-turn more after the first use.
Mistakes that dimple sinks
- Over-tightening on thin stainless until the deck dishes.
- Ignoring short flexis that yank the body every time you turn.
- Tightening a pillar tap on china without supporting from above.
- Using PTFE on a rubber deck gasket face where it does not belong.
When to call a plumber
Get help if the stud is stripped, the sink hole is oversized for the clamp plate, or the basin is already cracked. Wall-hung basins with hidden brackets are awkward without the right access. If you are replacing the tap anyway, follow how to replace a kitchen tap or how to replace a bathroom basin tap.
Same cluster: how to remove a seized tap connector when the nut will not move, how to fix a dripping mixer tap, and how to replace a ceramic disc tap cartridge.
FAQ
How do I tighten a loose tap?
From below the sink or basin, tighten the clamp nut or backnut while holding the tap square from above. Renew the deck gasket if it still rocks. Fix a wobbling handle with its own grub screw, not the deck nut.
Why does my tap keep coming loose?
Vibration, a flattened gasket, an oversized hole, or flexis that pull sideways. Fit the right plate and gasket, ease the tails, and re-check after a day of use.
Can I tighten a tap without turning the water off?
Often yes if you are only snugging the clamp nut and the tails stay connected. Isolate if you need to lift the tap, change the gasket, or disconnect anything.
18 comments