How to Skim a Wall Patch
27 August 2026 Joe HartleyIntermediate2–4 hours (plus drying)4 comments
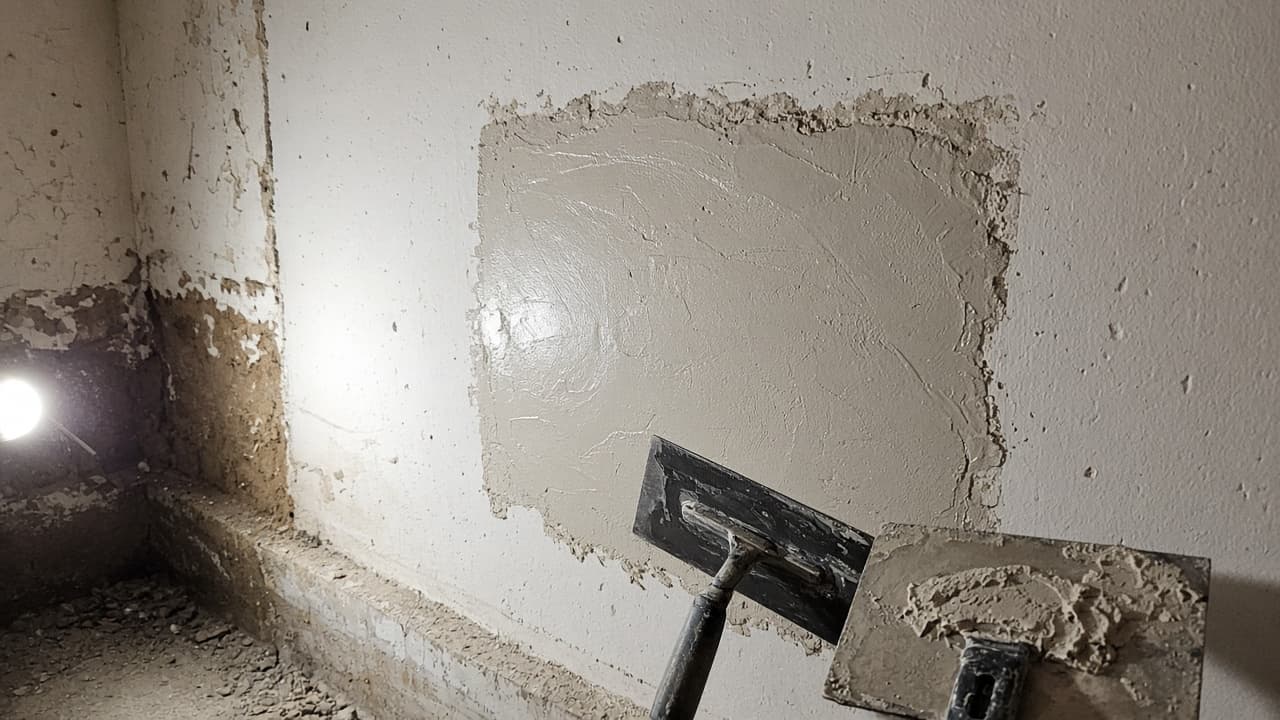
Tools
- Hawk and plastering trowel
- Bucket trowel
- Clean mixing bucket
- Spray bottle or brush for water
- Sanding block (fine grit)
Skimming a patch is about matching the old face, not learning a full-room float. Mix small, work wet-on-wet, and stop before the plaster goes off on the hawk. A tidy patch disappears under emulsion; a rushed one leaves ridges you sand for an evening.
This guide assumes the background is already sound: undercoat set, board taped, or old plaster cut back firm. If the wall still drums hollow, fix that first with how to repair blown plaster. Tiny hairlines only need how to fill cracks in plaster.
Is a skim the right finish?
| Patch type | Finish |
|---|---|
| Filled crack or shallow scrape under 2 mm | Filler and sand may be enough |
| Board joint or bonding coat proud of the old skim | Thin finishing plaster skim (this guide) |
| Whole wall wavy or heavily damaged | Full reskim by a plasterer |
| Hole still open to the void | Close the hole first: plasterboard patch or large plaster hole |
UK finishing plasters (multi-finish types) set faster in a warm, dry room. Mix less than you think you need for a first attempt. A cold garage mix on a hot summer wall will skin over before you have flattened it.
Kit list
| Item | Notes |
|---|---|
| Finishing plaster | Fresh bag; old, lumpy plaster is misery |
| Clean water | Dirty buckets seed lumps |
| 11–14 inch trowel | Smaller knives struggle to flatten |
| Corner trowel (optional) | Internal angles |
| PVA | Diluted seal on thirsty backgrounds only |
| Dust sheets | Splash reaches further than you expect |
Step-by-step
1. Set the background
The patch should be dust-free and roughly level with, or slightly below, the finished face. Dampen gypsum undercoat or plasterboard lightly. On very absorbent masonry undercoat, a thin diluted PVA left tacky can help; avoid a glossy sealed skin. Mesh-tape any board joints so the skim does not crack along the seam.
2. Mix a small batch
Add plaster to water (not the other way round) and mix to a thick cream that holds on the trowel without pouring off. Aim for a few minutes of comfortable working time, not a half-bucket that goes stiff halfway through. Clean tools the moment you pause; set plaster on a trowel ruins the next pull.
3. Lay on the first tight coat
Load the hawk. Push plaster onto the patch with firm pressure so it keys, then flatten toward the old wall. Keep the coat thin: roughly 1–2 mm. Overlap a little onto the existing skim so you can feather later. Work from the centre of the patch outward.
4. Flatten and second pass
When the first coat firms (loses the wet shine but still marks with a fingernail), dampen the trowel and flatten ridges. Apply a second thin coat if needed to hide the undercoat colour and fill hollows. A light mist of water on the trowel helps the final polish; flooding the face washes plaster off.
5. Feather into the old plaster
Use longer strokes that start on the new patch and run onto the old face. Stop polishing when the join feels flush under a straight edge or your palm. Chasing perfection with a drying mix leaves chatter marks. Let it set hard, then a careful sand with fine grit knocks any remaining nibs.
6. Dry and mist coat
Wait until the patch is uniformly pale and dry to the touch right through. Spot mist coat with diluted emulsion before full paint so the repair does not flash matt against the old wall.
Mistakes that show through paint
- Mixing too wet so the plaster slides and leaves hollows.
- Overworking a setting face until it tears and drags.
- Building thickness with finishing plaster instead of undercoat.
- Leaving a step at the edge because you never feathered onto the old skim.
- Full-strength paint on thirsty new plaster.
When to call a plasterer
Call a plasterer for ceilings, full walls, or if your patches keep cracking because the background is still moving. Ornamental cornices and lime systems need matching practice. If cold external walls keep staining after you decorate, the skim is not the fix: how to stop condensation stains returning on cold walls.
Cluster: fill cracks in plaster, repair blown plaster, hang plasterboard on a solid wall when boarding is cleaner than endless patches.
FAQ
How do I get a skim patch flat for paint?
Get a firm, clean background, mix a small batch of finishing plaster, lay a thin keyed coat, flatten as it firms, feather onto the old wall, then mist coat when dry. Keep coats thin and tools clean.
How long before I can paint a skimmed patch?
Often the next day in a warm room for a thin patch; thicker undercoat beneath can need longer. If the patch still looks dark or feels cold and damp, wait. Painting early is a common cause of peeling.
Why does my skim keep cracking?
Usually the background was dusty or still hollow, the coat was too thick, or the mix was overworked as it set. Tape board joints, cut back blown plaster, and resist polishing a face that has already gone off.
4 comments