How to Replace a Gutter Joint
24 August 2026 Joe HartleyIntermediate45–90 minutes per joint20 comments
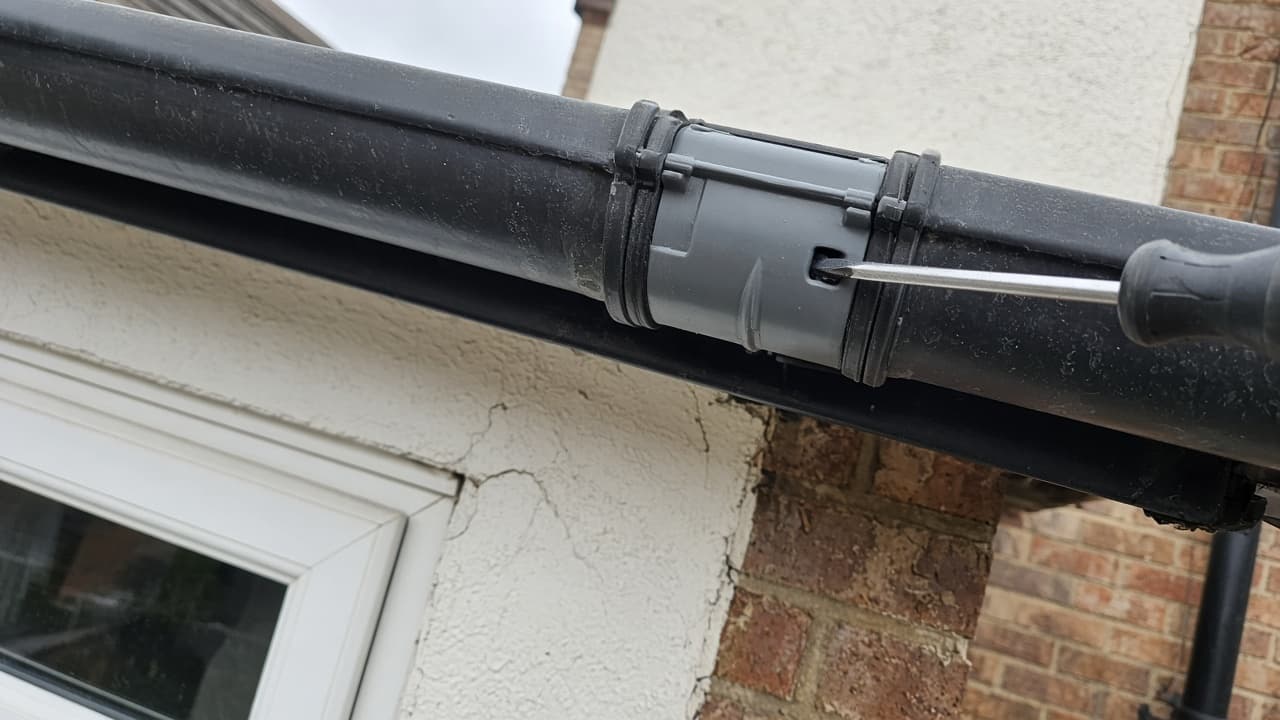
Tools
- Stable ladder, footed by a helper
- Matching gutter union / joint for your system
- Replacement rubber seals if sold separately
- Soft brush and cloth
- Silicone lubricant approved for gutter seals (optional)
- Screwdriver or nut driver for fascia brackets if needed
- Bucket for old joint and debris
A gutter that drips in the dry after rain usually fails at a joint, not in the middle of a clean length. On modern UK PVCu systems the union holds two trough ends against rubber seals. UV, grit, and years of movement harden those seals until water tracks out onto the fascia. Replacing the joint is a short job if you match the profile and work safely from a ladder.
Do not climb onto the roof to fight a joint. If you cannot reach the union with three points of contact on a stable ladder, or the run is above a height you trust, use a contractor with proper access.
Match the plastic system
UK DIY stores sell several families that look alike from the pavement and fight each other on the ladder.
| Profile family (examples) | What must match |
|---|---|
| Half-round | Diameter, seal shape, clip style |
| Square / square-line | Width, depth, union latch |
| Ogee | Curve and seal pockets; do not mix brands casually |
Take the old union to the store, or photograph the maker’s mark under the trough. A “universal” seal that almost fits will drip by the next wet week. If the whole run is brittle and chalking, one new joint buys time; plan a longer renew rather than mixing five brands along one elevation.
Clear leaves before you strip the joint so grit does not score the new rubber: clear guttering. Downstream leaks at the shoe need downpipe attention instead.
Step-by-step
1. Support both trough lengths
Set the ladder under the joint. Note how the old union clips: some squeeze and lift, others have a hinged latch. Support the gutter either side so the lengths do not spring down and crack a bracket when the union comes free.
2. Unclip and drop the old union
Release the clip. Ease the union down. Catch any loose seal sections in the bucket. If paint or bitumen was smeared over a past leak, scrape it off the trough ends; goo on the new seal guarantees a bypass path.
3. Clean the seating length
Wipe the outside of each gutter end where the seal sits. Grit embedded in old rubber is the usual reason a brand-new joint weeps on day one. Dry fit the trough ends so they meet inside the union without a wide gap or a forced overlap.
4. Fit seals the right way up
New unions often arrive with seals fitted. If seals are separate, seat them fully in their grooves with the sealing lip facing the water path as the maker shows. A dab of gutter-safe lubricant helps the trough slide without rolling the rubber. Do not use random bathroom sealant as a substitute for a proper gasket on clip systems.
5. Clip up true
Offer the union, engage both trough ends to the depth marks or stops, then close the clip firmly along its full length. A clip that only catches at one end leaves a smile gap that drips in wind-driven rain.
6. Water test
Slow hose from upstream. Watch the joint underside and the fascia. A dry joint with water still spilling at the next bracket means a different fault (fall, crack, or another seal).
Job-specific detail: On clipped PVCu, the trough must sit on the back ledge of the union before the front latch closes. If you latch the front first, the back edge can sit high and the seal never compresses, even though the joint “looks on” from the garden.
Mistakes that keep the drip alive
- Mixing half-round parts into a square-line run because the colour matched.
- Leaving moss under the new seal.
- Pulling brackets so far apart that the union is in tension.
- Silicone smeared over a failed seal instead of replacing it; the next clean lifts the skin and the leak returns wider.
- Stretching from one ladder position until you rack the joint out of line.
When height or the system says stop
Stop for three-storey eaves, fragile fascias, asbestos-cement legacy gutters, or cast-iron joints with seized bolts you are not equipped to free. Call a gutter installer if short lengths keep cracking on clip-up (the run may be out of line or the fall wrong). Related fixes: clear guttering, fix a leaking gutter, and replace a downpipe.
FAQ
Do I need sealant as well as new gutter seals?
On modern clipped plastic systems, correctly seated rubber seals are the seal. Extra silicone often interferes with the gasket and makes the next repair worse. Follow the system instructions; most UK PVCu unions are dry-fit.
How do I know which gutter joint to buy?
Match profile (half-round, square, ogee), size, and preferably brand. Bring the old union or a clear photo of the end profile. Colour is cosmetic; shape is structural.
Why does the new joint still leak after fitting?
Ends not pushed home, seal rolled or gritty, clip only half engaged, or a crack in the trough outside the union. Refit once carefully. Persistent drips after a clean seat usually mean damaged gutter ends that need a short replacement length, not more sealant.
20 comments