How to Felt a Shed Roof
13 August 2026 Joe HartleyIntermediate2–4 hours17 comments
Tools
- Roofing felt and clout nails
- Sharp knife and straight edge
- Hammer
- Tape measure
- Stable step ladder
- Batten offcuts (for ridge)
Felting a new shed roof is the job that decides whether the OSB or boarding lasts five years or fifteen. Work on a dry day, keep overlaps running the right way for the rain, and nail close enough that wind cannot lift a flap at the eaves.
This guide is for a new roof on a freshly assembled shed. If the old felt is cracked, green, or leaking, use how to replace shed roof felt instead. Hub: how to build a garden shed. Previous phase: how to assemble a shed.
Felt type and layout
| Choice | Notes |
|---|---|
| Mineral roofing felt (shed grade) | Green or grey mineral finish is standard for UK DIY sheds |
| Roll width | Often 1 m; plan sheet lengths before you cut |
| Layers | Many kits want two layers on shallow pitches, or a single heavy sheet plus ridge; follow the shed manual if it conflicts with generic advice |
| Clout nails | Short galvanised clouts; long nails that poke into the shed are a classic miss |
| Ridge finish | Separate ridge strip or felt folded over the apex with a timber cap |
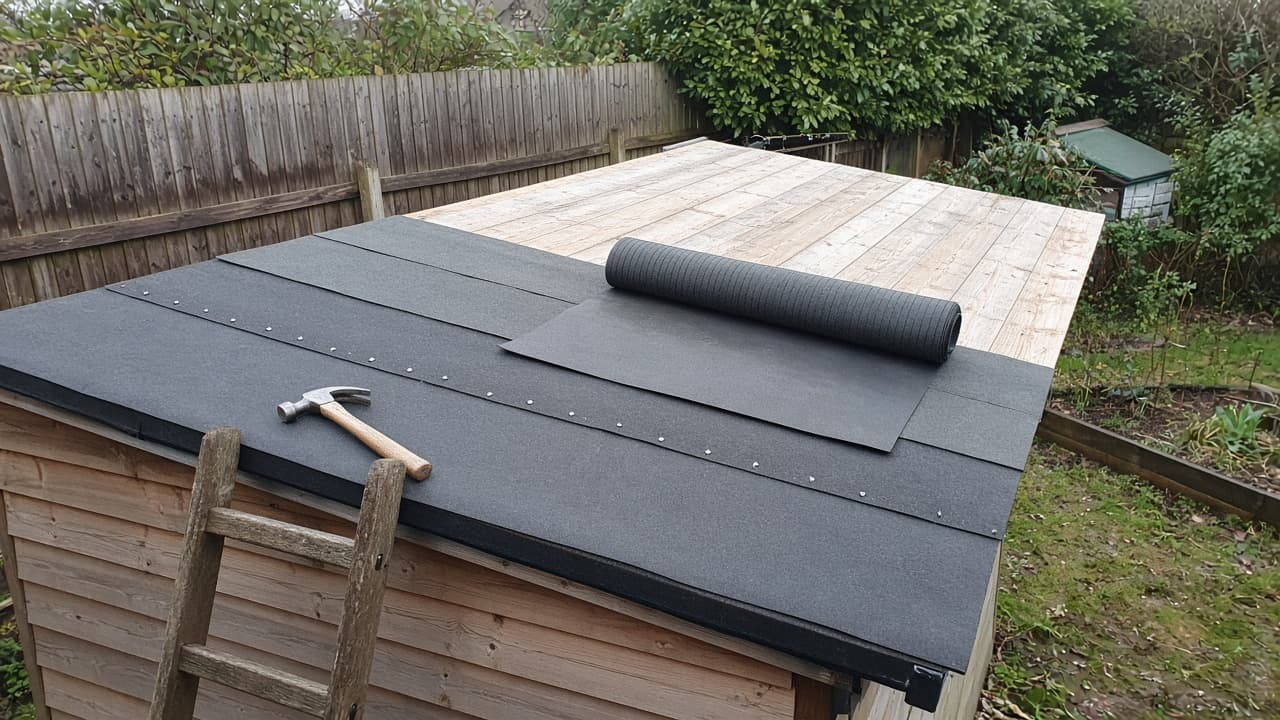
On a typical apex shed, lay sheets horizontally (parallel to the eaves), starting at the bottom so each higher sheet overlaps the one below. Rain then sheds onto the sheet beneath, not under the joint. A common overlap is about 75–100 mm on the long edge and more at end joints. Check the felt pack; cheap felt tears if you pull it drum-tight across a cold board.
Ladder stop: Set the ladder on firm ground, tied or footed if needed. Felt work means both hands on the roof often. Do not overreach from the top rung. If the roof is steep or the shed sits on a slope, get a second person to steady the ladder and pass rolls up. Do not walk the middle of thin roof boards.
No torch-on bitumen and no mains electrics in this guide. Shed kits are cold-applied felt and nails.
Materials checklist
| Item | Notes |
|---|---|
| Shed roofing felt | Enough for the roof area plus overlaps and a ridge strip |
| Galvanised clout nails | Closely spaced at eaves and verge; wider on the field if the maker allows |
| Sharp knife | Fresh blade; dull blades tear mineral grit into ragged edges |
| Straight edge / batten | Clean cuts at verges |
| Optional bitumen adhesive | Some packs suggest adhesive at overlaps; only if the product calls for it |
Step-by-step
1. Prep the boards
Brush off dust and protruding nail heads. Punch any nail that sits proud so it cannot puncture the felt from below. Roof boards should be dry; morning dew under felt traps moisture against the timber. Fit fascia and bargeboards if the kit wants them before felt, or leave clear edges if felt tucks under trims as drawn.
2. Cut and dry-fit the first eaves sheet
Unroll felt and let it relax flat if it has been coiled cold. Cut a length that covers one roof slope from verge to verge with a little spare, or join sheets with a generous end overlap away from the prevailing weather if the roll is short. Position the first sheet so it overhangs the eaves enough to turn down later (often 30–50 mm) without covering the whole fascia in one clumsy flap.
3. Nail the field, working up the slope
Fix the bottom sheet along the eaves with clout nails at roughly 50–100 mm centres (tighter in exposed gardens). Work up the slope: each new sheet overlaps the one below. Keep the mineral face out. Avoid a line of nails that all sit in the same board edge if you can spread them onto sound timber. At the verge, leave enough felt to fold down the bargeboard and nail neatly, or trim flush if a verge trim covers the edge.
4. Finish the ridge
Cap the apex with a separate ridge strip that overlaps both slopes equally, or fold a wide strip over the top. Nail both sides. A timber ridge rail over the felt (if supplied) protects the crown from bird damage and UV splits. Do not leave a raw butt joint of two slope sheets meeting at the peak with no cover.
5. Turn down edges and check
Fold eaves and verge overhangs neatly and nail. Trim ragged mineral with a sharp knife. From the ground, look for lifted corners and gaps at overlaps. A windy night will find any flap you left soft.
Mistakes that leak before Christmas
- Starting at the ridge and working down, so every overlap faces into the weather.
- Stretching cold felt until it thins over board joints, then splits in the first hard frost.
- Sparse nailing at the eaves “to save nails”. Wind gets under and strips half the roof.
- Leaving end joints in the middle of a slope with almost no overlap.
When to stop and get help
If roof boards are soft, sprung, or missing, fix the timber before you trap rot under new felt. Call a carpenter if the structure feels unsafe to work on, or if you need scaffold for a tall apex you cannot reach from a stable ladder. Replacing failed felt on an old shed is a different sequence: how to replace shed roof felt.
Series: assemble the shed → this job → later replace shed roof felt when it ages, and fit shed windows and doors. Hub: how to build a garden shed.
FAQ
How much overlap for shed roof felt?
Aim for about 75–100 mm on horizontal joints unless the felt or shed instructions say more. End joints need a larger lap, and the ridge strip must cover both slopes cleanly.
Can I felt a shed roof in the rain?
No. Water trapped under felt soaks the boards. Wait for a dry spell and dry timber.
Do I need adhesive as well as nails?
Many shed felts are nail-only. Use adhesive only where the product instructions require it at laps. Nails at the right spacing matter more than random blobs of bitumen.
17 comments